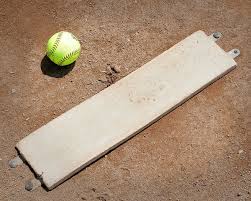
This Softball Pitching Review is a quick discussion on windmill pitching and ways to improve.
Dry Pitching
This is a key drill for Windmill pitchers because it forms the base on which most other drills are built. As with other drills, it is a simulation of pitching motion. It will help develop your coordination for the Windmill pitch, and promote a feeling for the complete motion.
Advantages
The main advantages of this drill is that it allows pitchers to perform more repetitions of the complete pitching motion within a short time span. For example, working at a moderate pace, you can do 60 to 80 rotations per minute. If you were actually pitching, you would require at least 10 to 15 minutes to throw that many pitches.
Another advantage of this drill is that you can perform it in your own room any time you wish; no facilities required.
Finally, it can be used to promote strength, endurance and flexibility by simply holding a weight of a light weighted ball in your pitching hand.
Note: As your pitching arm approaches the point of release, your weight will shift to your back foot slightly. If you push against this foot, you can accelerate the hip thrust and get more power in the pitch.
When performing this drill it is very important to maintain proper pitching form throughout the exercise. This will cement good habits and help develop the sense of power you need to throw hard.
Workloads
To measure your workload, simply count the number of rotations your arm makes. when getting into shape at the beginning of the season it is best to start with a light workload and increase gradually.
Practice Activity
Use the chart to check your technique in executing this drill. Once you have worked with it a few times, the key points will become second nature to you. A full length mirror is also helpful in checking out your form.
Here’s what to do:
- If you can find a mirror, use it; if not, try to get a someone to check your technique
- Perform the drill
- start with the long stride – ensure the toe points straight ahead
- the arm travels straight up in front of the body, well extended but relaxed
- the arm is close to the head at the top of the circle, extend upward to increase the circle
- the shoulder opens at the start of the downswing to permit full rotation, hips open to 3rd base
- hips rotate forward as the arm reaches the release point, arm makes contact with the hip during the forward thrust which provides power
- Check each point on the checklist in sequence as you do it
- If applicable, have someone watch you from the back as well as from the front
- Use the guidelines in the workload chart, or adapt them to meet your needs
- Continue your program until completion
The idea of this drill is to keep your arm circling as you focus on developing smooth coordination with the hip thrust.
Softball Pitching Review Checklist
Correct Action OK Not OK WHY NOT
Stance – stride foot forward
- long stride
- toe pointing forward
Arm Motion
- straight up front
- near the head at the top
- straight down in the back
- contact the hip at the bottom
Shoulder
- full rotation with arm motion
Hip Action
- turned outward when the arm is at the top
- turned toward the batter when the arm is at the bottom
- contact with the arm at release point
